Notes from the Amiga - AjSTer oops

October 6, 2022

Well not only did I have to take a Blender-shaped knife to the top of the case, I also have to take one to the side of the case as well.

DE-10 Nano and MiSTer Digital I/O board inside the AjSTer case

I can’t get power over to the USB hub via the DE-10 Nano without some creative solution. I’ve seen one build where someone soldered a power cable coming off of the DE-10 to power the USB hub, but I’m not that confident in my soldering skills right now to try that.

So I’m going to cut a hole in the case for the DE-10 power plug, then run a cable out the side and back into the case for the hub. I also need to print a different USB hub-side of the case, ‘cause I printed the one for two exposed USB ports and I only have one over there. Oops.

At least I have all the electronics components I need to build this thing. And once it’s all built and working, I’ll put up my modified files on Thingiverse and here for others to use.

Notes from the Amiga - Building the AjSTer Part 1

October 5, 2022

Most of the parts to assemble my AjSTer arrived, so I started on construction. I decided to tackle the hardest part first, the soldering. 
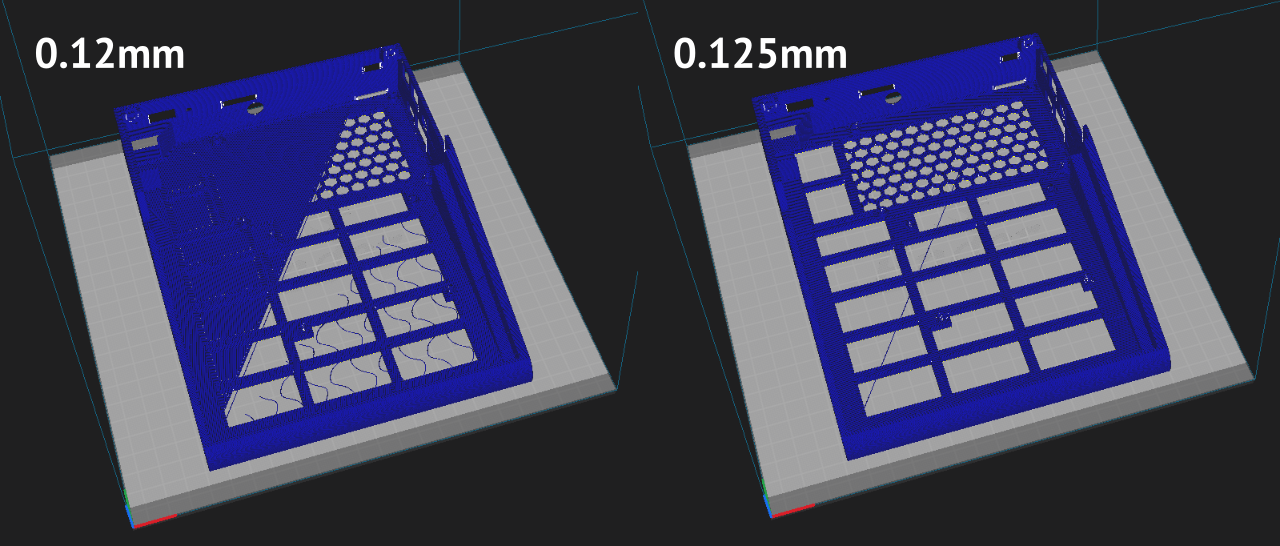
Also, depending on how the soldering came out, I’d likely need to reprint some parts.

I got the primary parts list from BuildingTents’ build, but I ordered a different Micro USB header which seemed simpler to use suggested on Reddit.

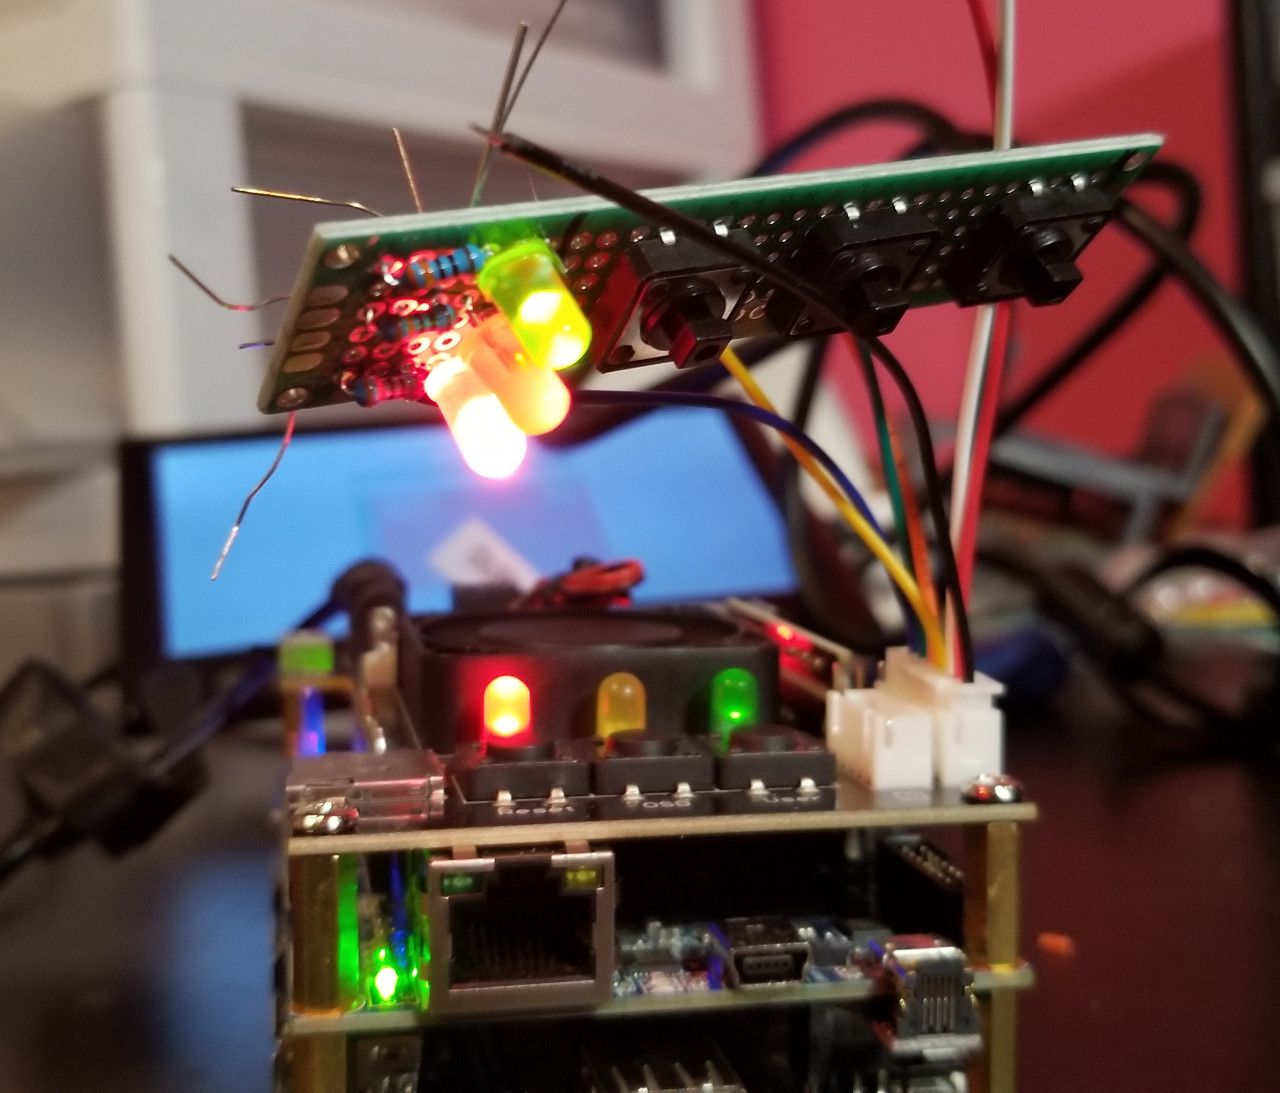
The MiSTer digital I/O board has two connectors for external buttons and LEDs. I found a great diagram showing how to wire up the LEDs, and my breadboard setup and subsequent soldering job worked out great.

MiSTer with my hand-soldered LEDs and buttons on PCB board

The buttons were a little more difficult and required some experimentation. The first pin on the Digital I/O board for the buttons seems to be on the other side of the connector as the LEDs, so I had to wire the buttons “backwards”. Once I figured this out, breadboard testing, and subsequent soldering, went smoothly.

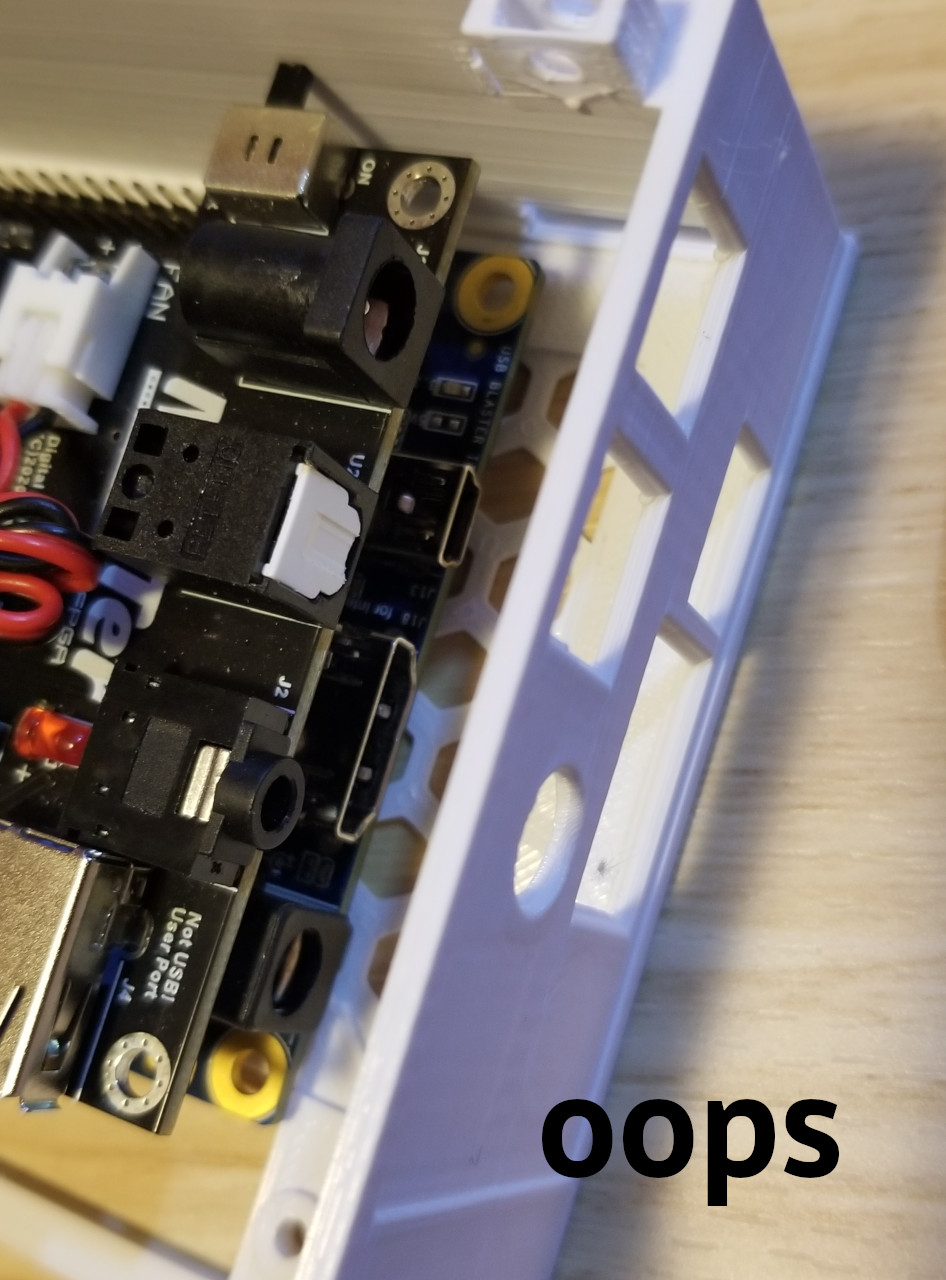
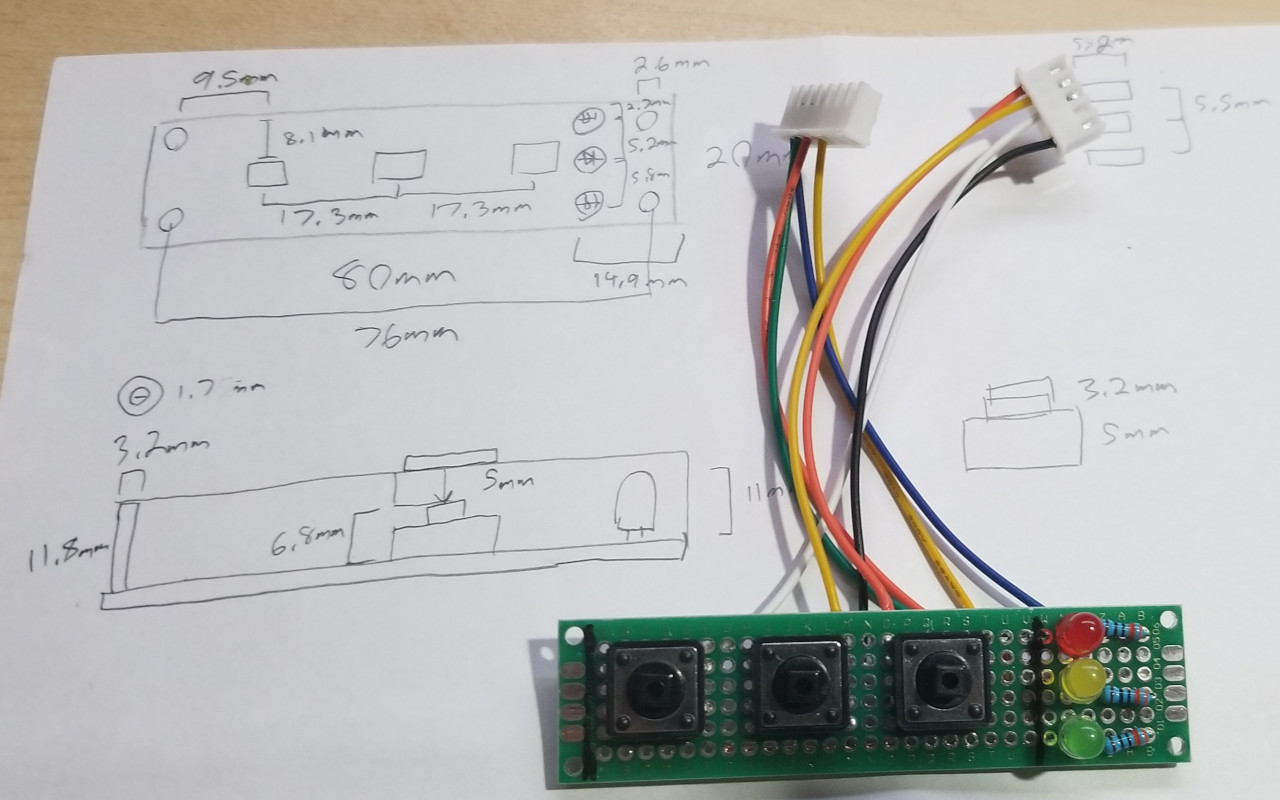
Since the PCB I got wasn’t the same one as the original creator used, the top right part of the case needed to be reworked. I grabbed my calipers and some paper and took as many measurements as seemed to make sense to ensure:

  • the board had enough clearance for the LEDs I was using,
  • the printed buttons, which I now needed to modify, would extend down from the top of the case far enough to hit the buttons on the PCB,
  • and the PCB could be mounted securely to the case, in case I decide to aggressiely reset the MiSTer in a fit of rage from losing at Battletoads yet again.
Diagrams of measurements for how I need to modify the case

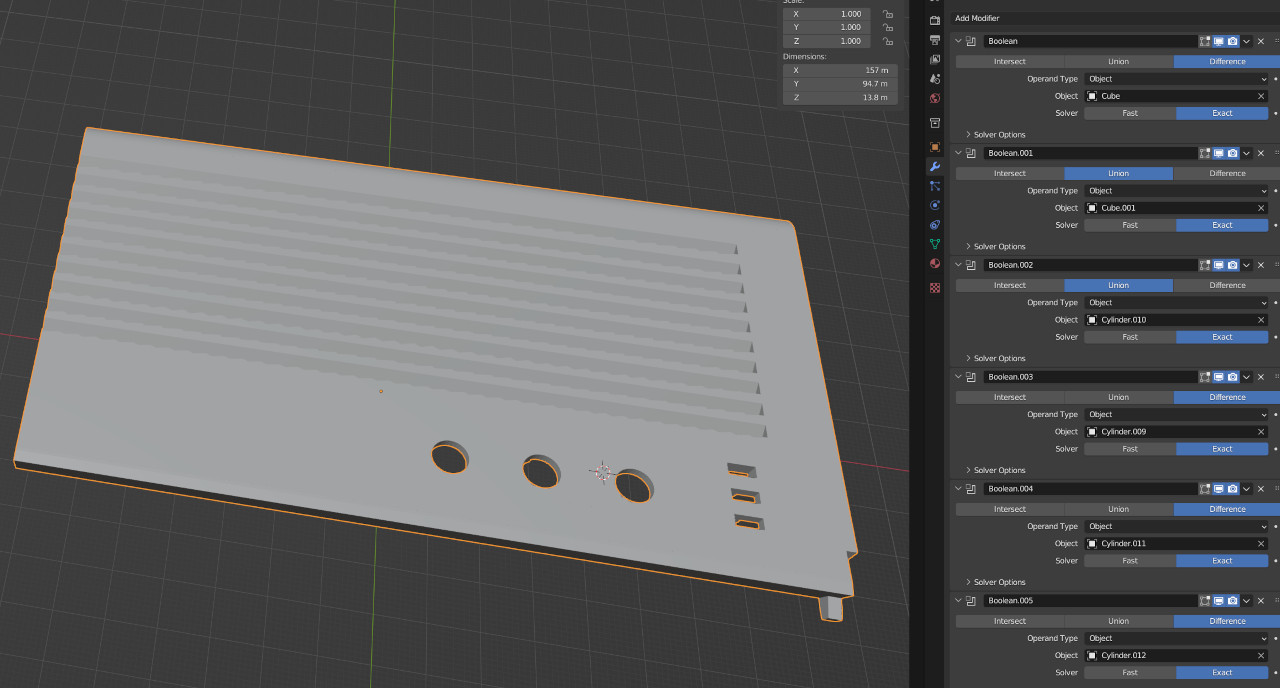
My go-to way of building most 3d models nowadays is using the Boolean modifier in Blender. Rather than directly modifying vertices, I’ll drag cubes and cylinders and whatever overtop of an object and use the modifiers to make non-destructive cuts. This was how I built the floppy disk model for the Amiga Architecture 101 video, and it’s how I modified the AjSTer case model.

Blender showing lots of boolean operations on the reworked case

As I’m writing this, the new case part and buttons are printing away, and I have one cable I forgot to order, a USB to headers connector for the USB hub, arriving tomorrow. If my schedule holds up, I can have this new case assembled sometime this weekend!

Amiga Architecture 101: The Basics + Gaming

October 1, 2022

Want to try out gaming on the classic Commodore Amiga computer? Topaz walks you through the basics of this retro computer’s hardware, and the things you’ll need to look for to get your own setup working.

I currently use these emulators:

If you’re on Windows, you can run the venerable WinUAE (https://www.winuae.net/).

You can get Kickstart ROMs from Cloanto and their Amiga Forever pack (get at least the Plus Edition for the more modern Kickstarts) and/or from Hyperion if you want AmigaOS 3.2, a modern AmigaOS for applications.

I leave ADF and WHDLoad archive hunting to the viewer!

Thanks to Meredith, Tyrel, Dave!

Credits

Notes from the Amiga - My Modern Sneakernet

September 30, 2022
CompactFlash card and PCMCIA card reader

After having set up the Plipbox, I wanted to then set up an easy way to get these blog posts over to my laptop for publishing. I figured I could configure an FTP server running in Docker somewhere on my local network, and then use some Amiga-based FTP client to move files around.

The FTP server was easy enough to get running. On the Amiga side, I first tried using FTPMount, but that failed hard when I used it with Workbench or Directory Opus. I downloaded AmiFTP and got that working with the server…but then I decided to stop pursuing that approach.

One of the things I enjoy about using older machines like an Amiga is the fact that things aren’t frictonless. So much software, especially SaaS software and consumer applications, is built to reduce friction as much as possible in order to maximise some aspect of usage, usually engagement.

I’ve been using a PCMCIA CompactFlash card reader as my modern floppy disk on the Amiga. Then I read the CF card on my laptop to get the posts ready for publishing. I kinda don’t mind running a sneakernet for this blogging. It makes the experience just a little more tactile, more retro, without going all the way back to slow, unreliable floppy disks.

Notes from the Amiga - Plipbox

September 29, 2022

I didn’t want my Amiga 1200 confined to a non-networked life. I’ve been exploring network solutions for it for a while and finally settled on a Plipbox setup.

A Plipbox connected to my Amiga 1200

I ordered a fully-built one from Amiga68k.com and used a spare Mini USB cable to power it. I found that trying to use MiamiInit in MiamiDX would hang when it got to Verifying DNS Servers, so I ended up configuring it manually. It’s working great! I installed the demo of IBrowse and the ‘030 in my machine handles the Ethernet traffic at a reasonable enough pace. Considering that my networking options on my prior Amiga were a 56K modem, I’m not complaining if my bandwidth is measured in the tens of kilobytes on this machine.

Notes from the Amiga - Cura and the AjSTer

September 27, 2022

I’m in the slow process of printing out the AjSTer, a case for my MiSTer that incorporates a mechanical keyboard so it feels more computer-y when I use it for computer things. It’s likely the place where I’ll try out Atari ST emulation for a future video, and it’ll be the device I bring around when I want to do Amiga or PC emulation in the wild.

I started running into a weird problem I’ve hit with Cura in the past – a random layer has a big slice filled in with skin, despite the model being perfectly manifold. For the bottom piece for the Digital I/O board, the glitch appeared when slicing at my usual default layer height of 0.12mm. Bumping the layer height up to 0.125mm got it to go away, but the behavior is really bizarre.

Cura 0.12mm vs 0.125mm

Also the keyboard on this A1200 is starting to be more responsive. Most of my keystrokes are registering right away. I think the old thing just needed some breaking in.